Configuring RS Energy in RS Production
In order to make sure that the RS Energy product works as intended, you need to ensure that a few settings are configured in the RS Production Settings menu.
Start by navigating to the RS Production software.
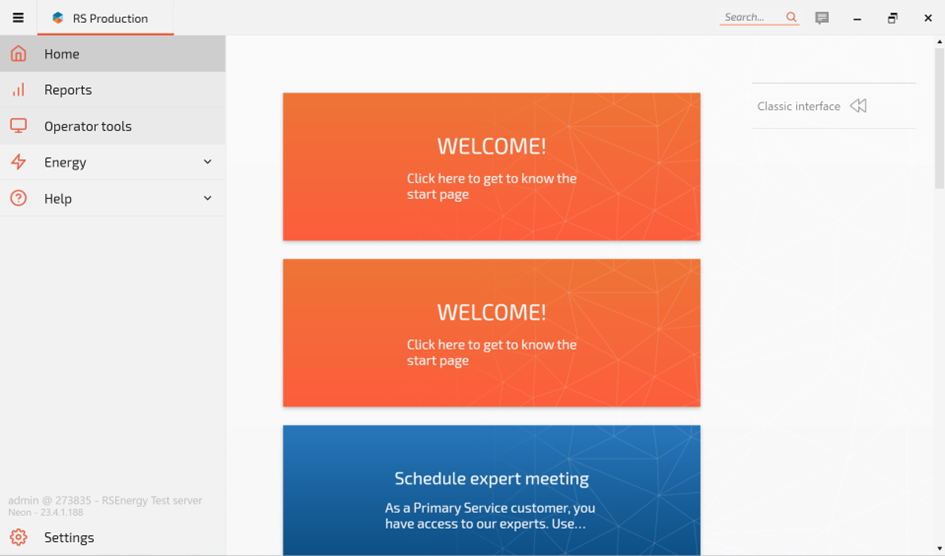
Then click on Settings in the bottom left corner. Then proceed to click on the Energy section of the Settings menu.
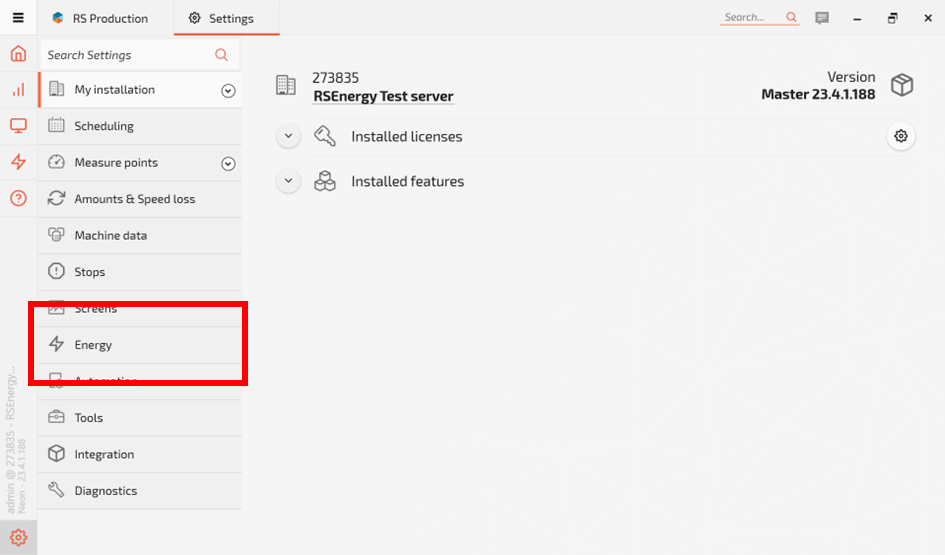
The first step here is to configure the energy sources correctly. If you have followed the previous instruction on how to set up the RS IoT box and the associated clamps, one or several clamps will now appear in the Energy Sources section of the settings.
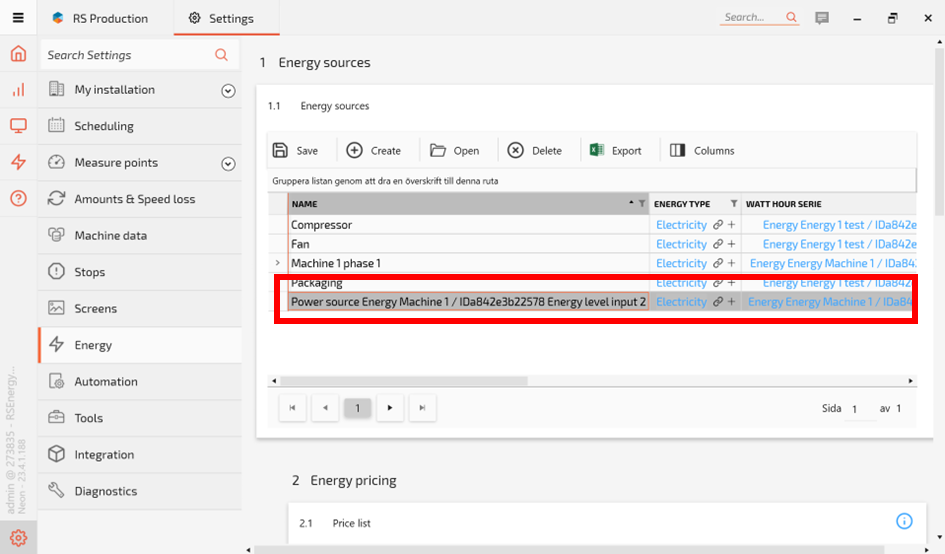
In our example, we named the RS IoT box Energy Machine 1, and as such it appears as a row in the table as shown in the picture above. If you wish to change the name, double-click on the name to change it.
In our example, we will name it “Machine 1 phase 2”.
Associate the clamp with a Measuring Point
Scroll to the right in the table to find the setting for associating the clamp with a Measure Point. Click on the Link/Connect symbol to associate the energy clamp with a measure point.
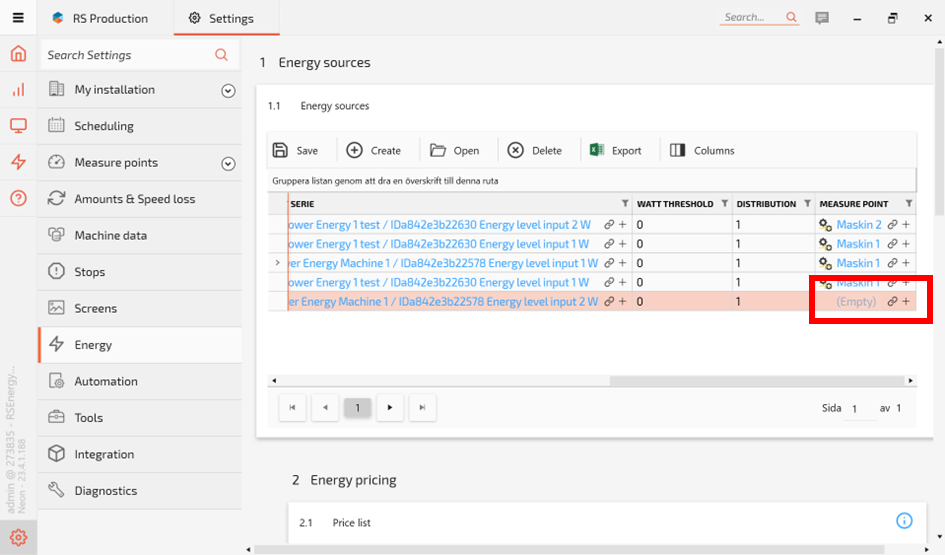
Choose the correct Measure Point and save and close.
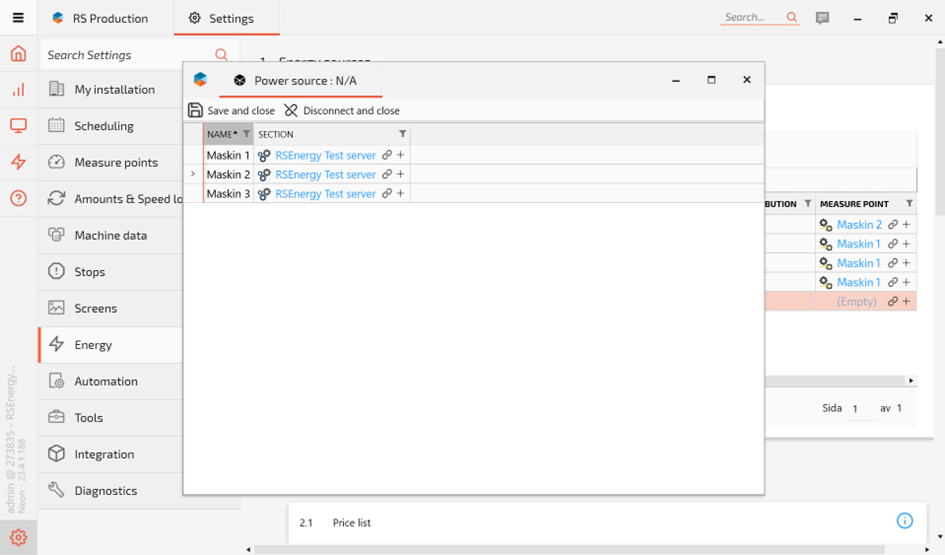
Associate all the clamps you have installed with the right measure point before proceeding.
Balancing energy readings between Measure Points
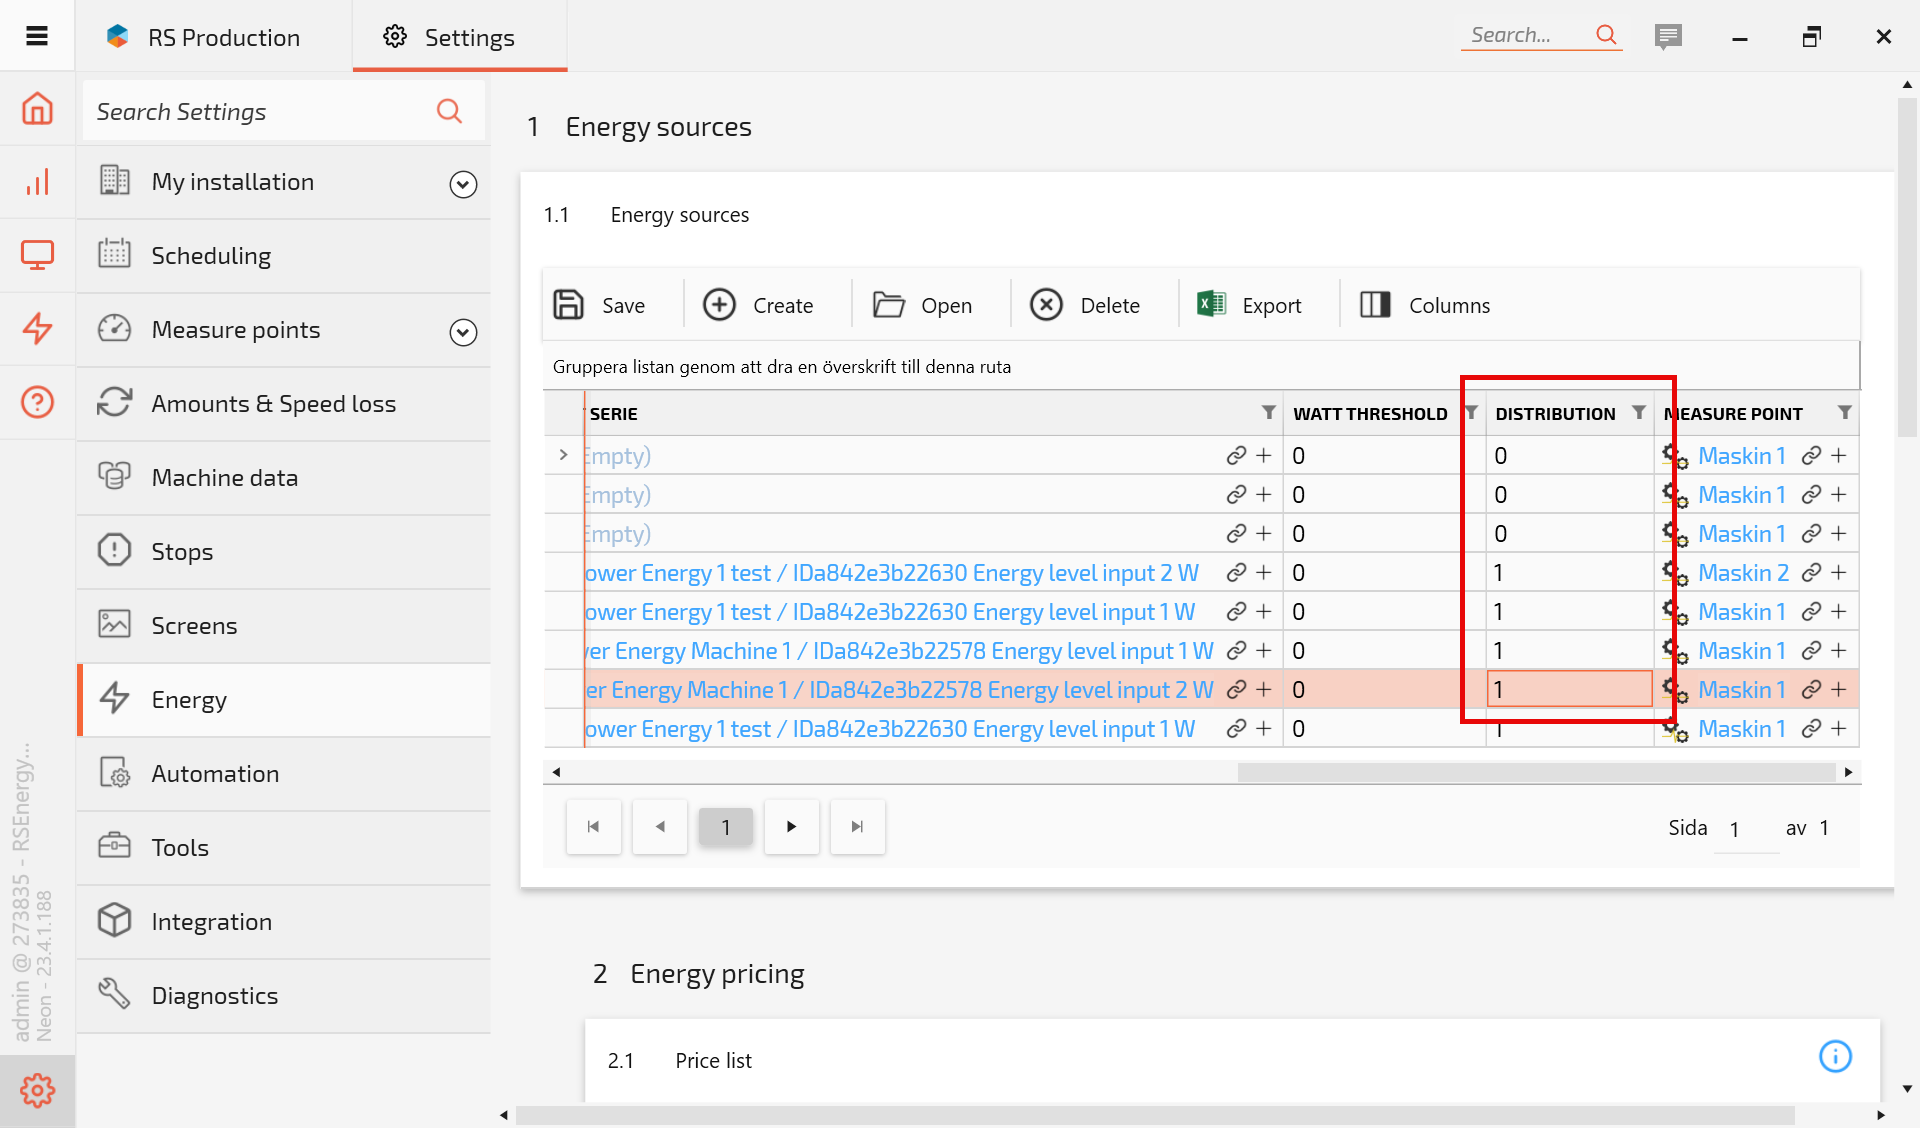
Each energy measure on machine equipment is equal to a power source in RS Energy. A measure point can be connected to one or more power sources, it is also possible to set how much the power source that contributes to the connected machine with a percentage value between 0 to 100%.

You can control how much of a power source that a machine uses, by allocating a value to the Distribution column. The value should be set somewhere between 0 (no contribution) and 1 (100% contribution).
The Distribution setting is found next to the Measure Point setting.
Configure Watt thresholds
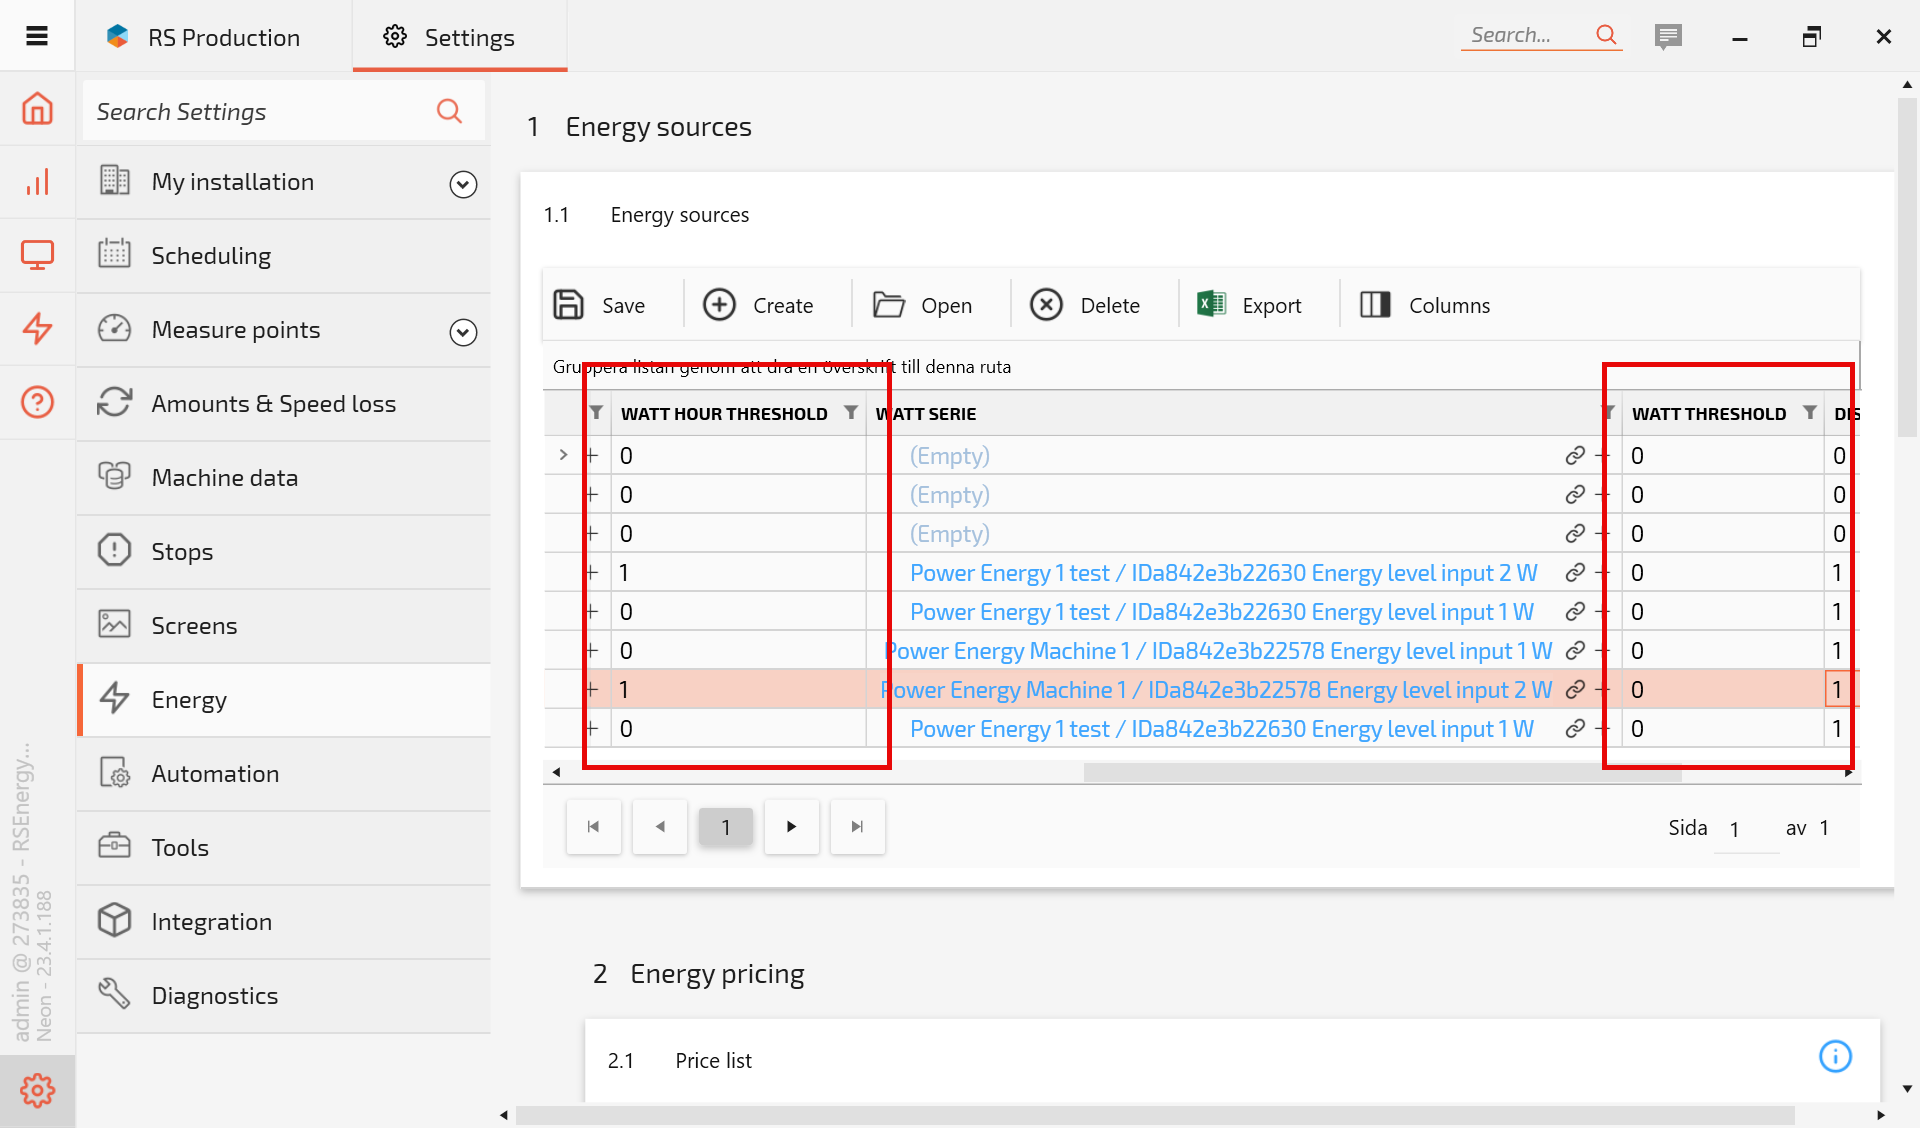
For every power source, you can configure both a Watt Threshold and a Watt Hour Threshold. These are found on the same row as Distribution and Measure Point settings.
The Watt threshold sets the maximum number of watts that a power source should ideally go to and the Watt Hour threshold sets the corresponding limit to the watt usage per hour. These limits are set in order for a red line to appear in the graphs in the Energy analysis, to make any deviation above this limit easily identifiable.
Configure Energy Pricing
In order to get the correct values in the Energy reports, you need to configure the energy prices on which the calculations are based.
Energy pricing is handled in two main ways:
Fixed pricing, based on your negotiated deals with you electricity provided. This is the most common option for most manufacturers.
Spot pricing, based on the local spot prices for your pricing area for electricity.
Fixed prices
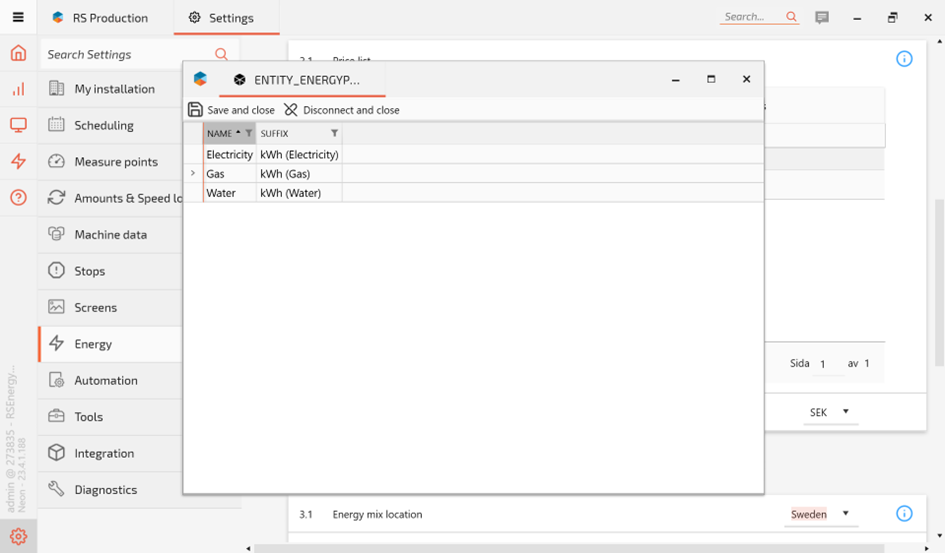
If you are using fixed prices, start by documenting them in the table below.
Create new price values and associate them with a time period, price, currency and energy type. In our example below, we pay 1SEK per kWh for electricity starting on the 25th of August 2024.
Note! The date refers to the date that the price starts to take effect. This means that if your prices change, you add a new row with a new date and from that date, calculations will be based on the new price. However, since you are keeping the old prices, historical data will be correctly calculated based on the prices that were in effect then.
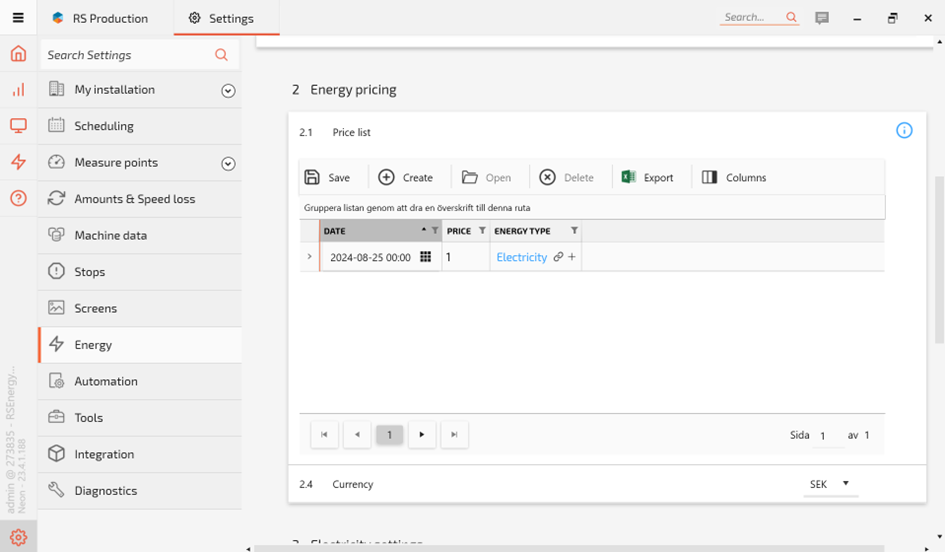
Add more lines of energy types, prices and time periods as needed. Make sure that you have clicked the “Use fixed pricing” checkbox below.
Spot pricing / variable pricing
If you are buying your electricity at current market variable rates, leave the checkbox “Use fixed pricing” unchecked. In addition, do not create any lines in the Energy Pricing Price List above; electricity prices will then be calculated automatically using the market data from the Nord Pool energy market platform.
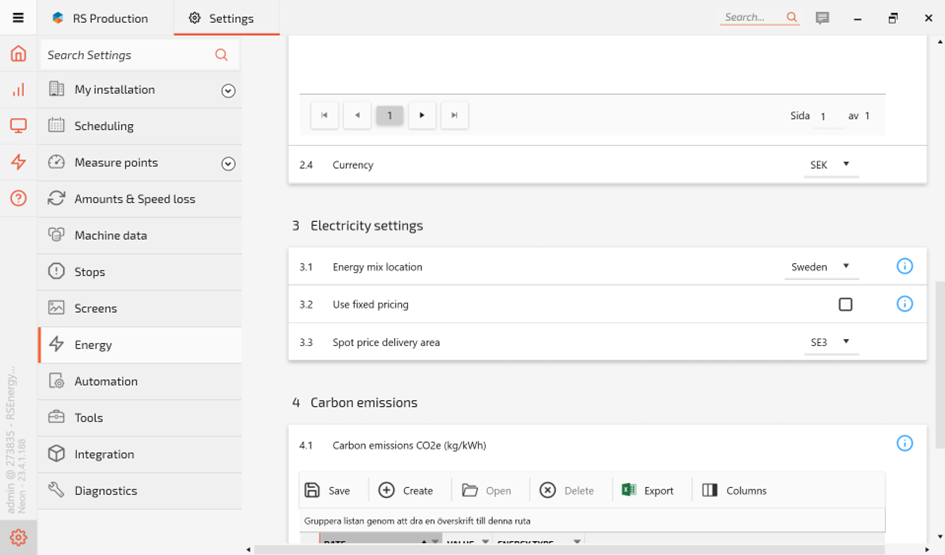
Configure Electrity Settings
In order to get electricity settings correct, you also need to configure some general settings.
· Energy mix location
· Use fixed pricing
· Spot price delivery area
These setting should reflect your setup, even if you are using Fixed Price, as they are also used to calculate your CO2 emissions.
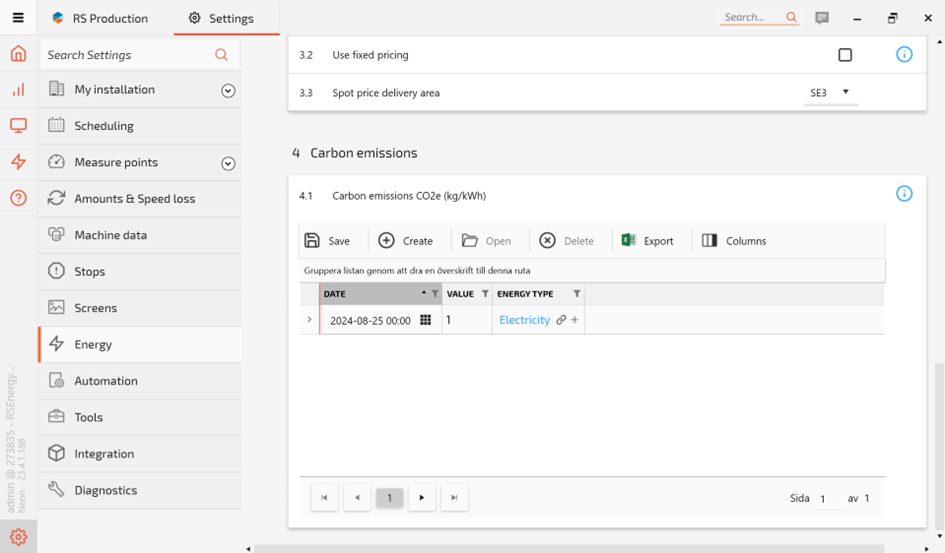
Configure carbon emission settings
Finally, in order to calculate carbon emissions, a value has to be assigned to each energy type that is being used. In this example, a kg/kWh has been assigned to the electricity usage, starting from a certain date.
Continue to the next page: RS Energy Reports - Setup and configuration guides - Confluence (atlassian.net)