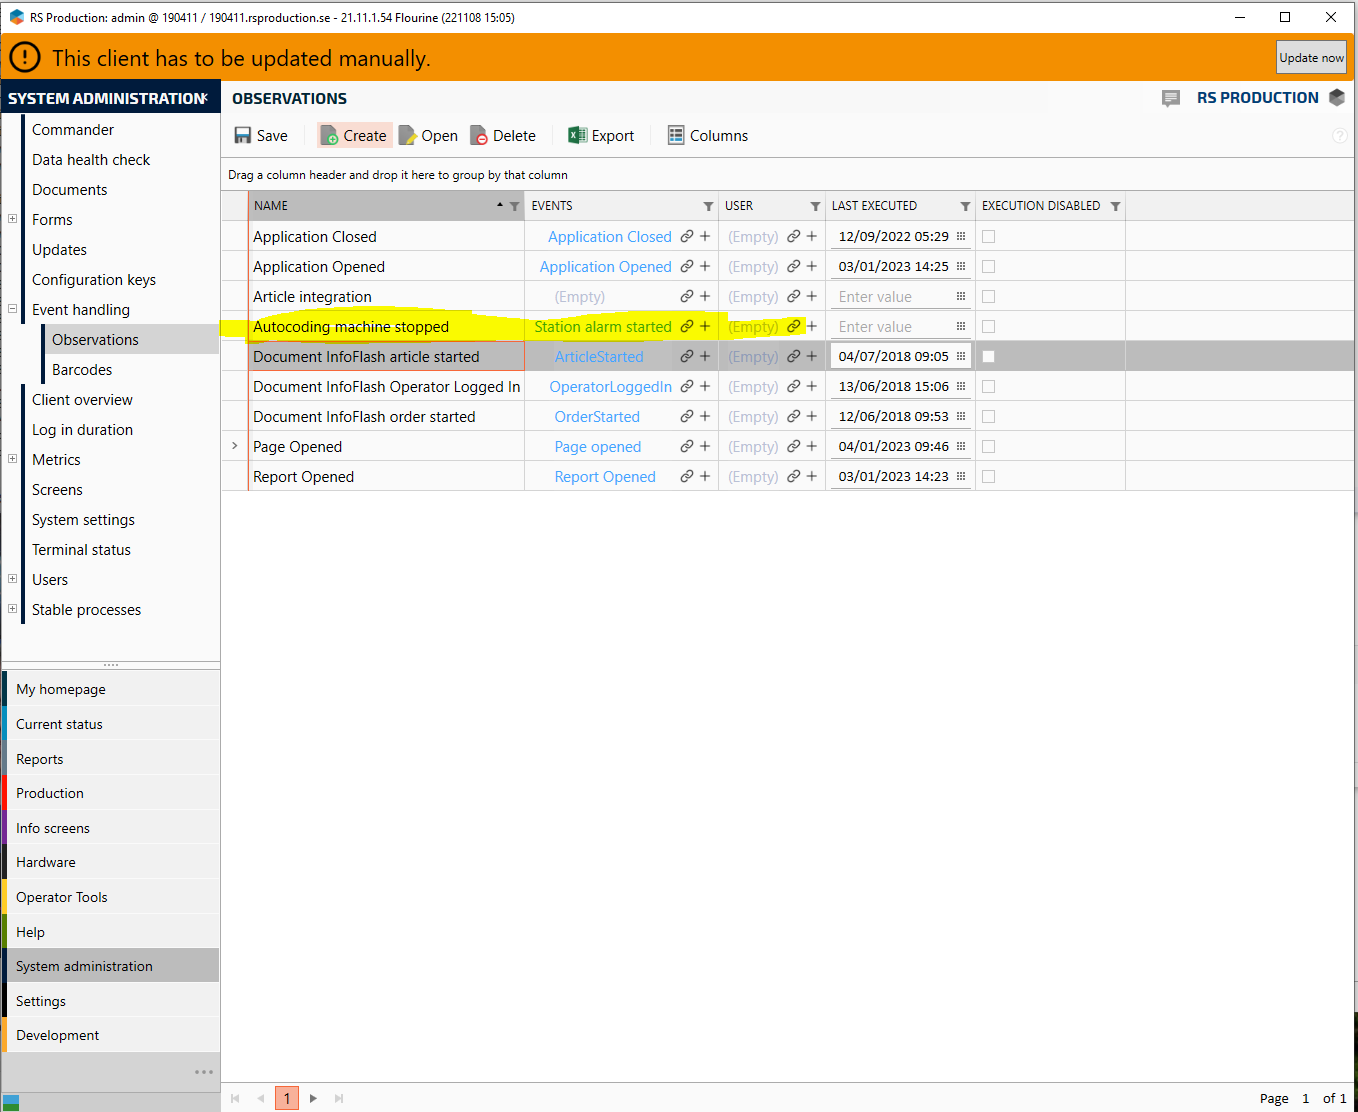
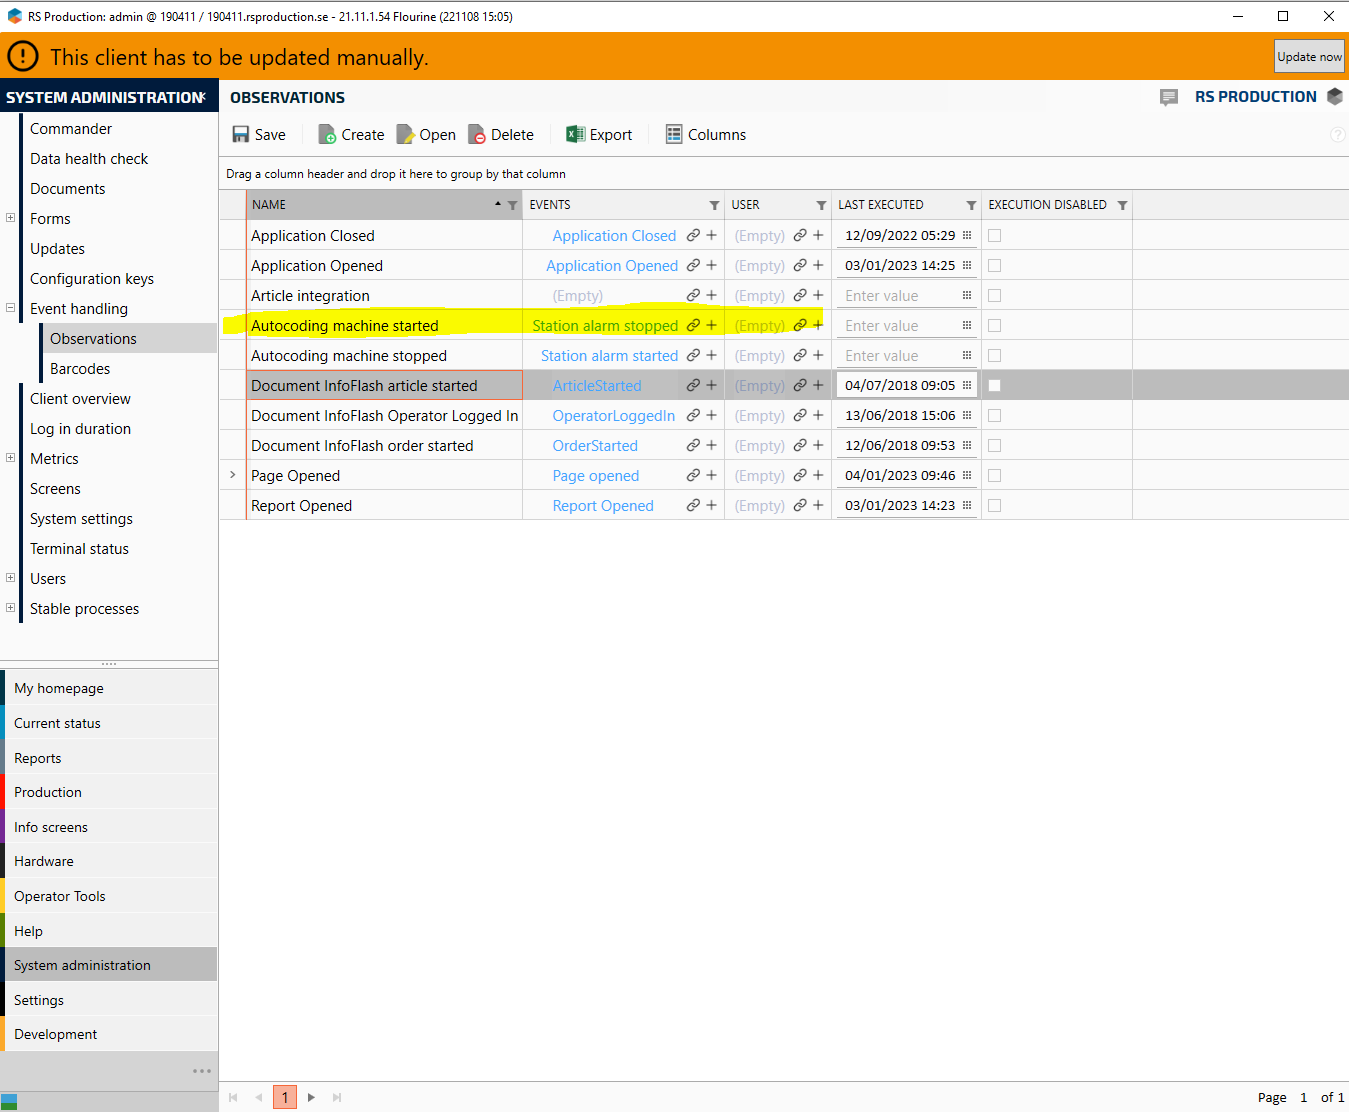
Automatic stop reason handling
RSProduction can handle a wide variety of automatic stop reason coding and stop handling. This guide will explain what could be done to some extent in the most common case but the events and observations could be modified to do even more logic and variants.
It is good practice to use automatic coding to code the station of the stop and then let operators code the reason of the stop if it gets long. Even if the machine could know why it stop it rarely or almost never knows why it is standing still.
Simple automatic stop reason coding with on/off signals
This is the simplest way to do autocoding but it also only supports one case of signal logic.
It is based around On/Off-signals where the logic is as follow:
Machine running
All signals is must be high
Machine stopped
Any signals goes low. The first signal that does this will be the one that sets the reason/station on the stop that is created
How to setup
Connect all signals that will be used thru RSIoT or OPC
Open OfficeTools and navigate to Settings/Machinedata/Production time signal connections
For each signal click create and connect it to the correct input, measuringpoint and stopreason and/or station
Make sure that the input signal is always constant when the machine is running otherwise set filters on the signal. Also make sure that the function “PulseInputStatus” is checked on the input that is used for this functionality.
Advanced automatic stop reason coding with Station alarms
For all other cases that is not supported in the previous example you will have to use StationAlarms to set up the automatic stop reason coding. Some example of cases that can be solved with this is the following:
Automatic stopcoding stops that is triggered by cycle signal (Longest cycle time)
Automatic stopcoding where some of the signals could go on and off even if the machine is not stopping and only one or a few of the signals actually indicates that the machine is standing still
Automatic stopcoding where all signals must be in alarm for the machine to be considered as stopped
Important difference to previous example
When using stationalarm the core thing to think about is that when a stationalarm signal is High that is considered to be in alarm. In the previous example it was the opposite with a High signal means all ok/machine running.
How to setup
Signals
First we need to set up all the stationalarm inputs.
1. Make sure all inputs gets triggered when they are supposed to and that they all indicates High when in alarm/stopped. If they are not use the “Invert” checkbox on the input
2. Set filters on the inputs if they could have a tendency to go on and off again fast without really indicating an alarm. Alarms will trigger eventlogic and in a situation with flickering signals this could overload RSProduction server
3. Activate “Debug” feature on all inputs used as StationAlarms. This is a checkbox on the input.
4. In OfficeTools navigate to Settings/Machinedata/Station alarm signal connections
5. Create Station alarm signal for each input that will be used. And set the propertys on the signal as following:
Alarm type
If the signal should create a stop when the alarm is activated select “Production signal”. If there is no such Alarm type, create it
If the signal should be used as an autocoding signal if the machines stops but not trigger a stop itself choose “Station alarm”. if there is no such Alarm type, create it
In advanced cases more types could be created to do more advanced logic but that will not be explained in this article.Station
Station is here an indicator on what this signal is located or in some cases the reason that should be set on the stop. Select the Station connected to the correct measuringpoint that this signal should have. If it does not exist, create it and connect it to the measuringpoint that this signal is connected toIO-interface input
Connect this to the inputStopReason
If this signal should also code a stopreason then set that stopreason hereTime offset (Advanced)
This could be used when having long lines to offset the start of an alarm signal compared to other alarm signals. When a stop is created and coded the logic will look for the earliest signal triggered and that time could be offset using this property on how his particular signal should be compared to other signals
Event handling when using cyclesignal as stop source
In this example we will have 1 eventhandler1. This should be triggered when the machine changes is status to stopped.
Station alarm active eventhandler (Machine stopped)
Navigate to Settings/Automation/Observations
2. Create a new Observation by clicking Create
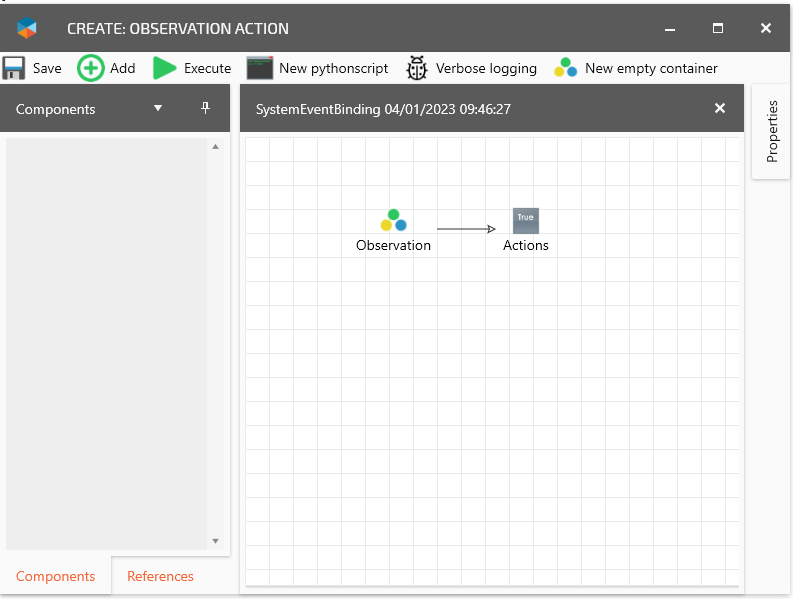
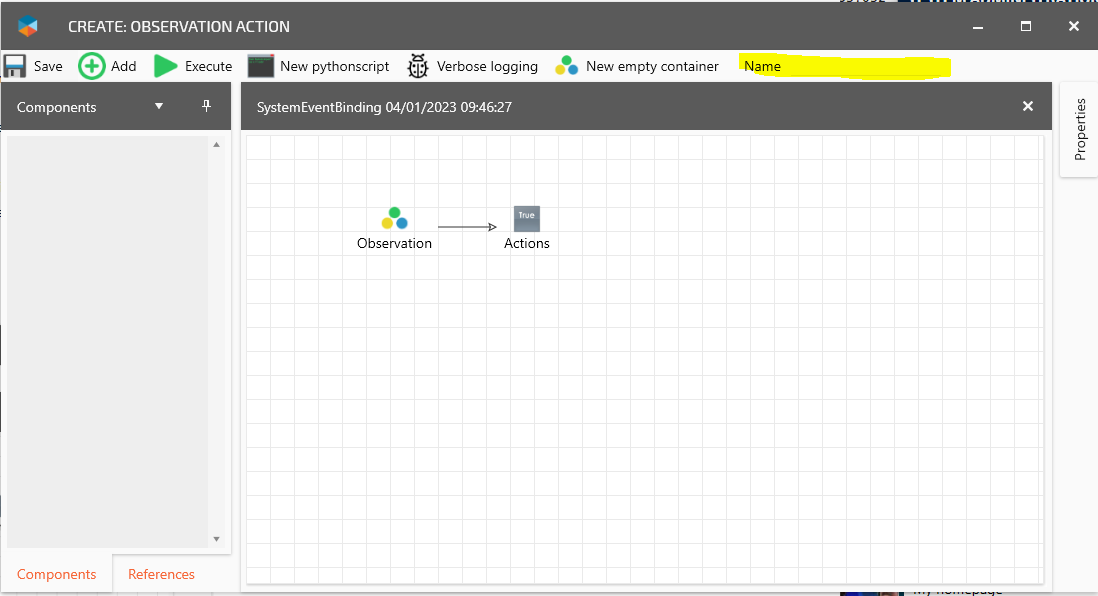
3. Expand the window so that you can see the name field and fill in “Autocoding machine stopped”
4. Double click on Observation
5. In the componentstab to the left find and add (“Using the add button on the top left”) the following component:
Observation/Current producing unit
Observation/Station alarm status
6. Choose “Station alarm” and “Any station has alarm” on the “Station alarm status” component
7. Select “StartCondition”, press and hold “Alt” key on the keyboard and then click on the “Station alarm status” component to connect them.
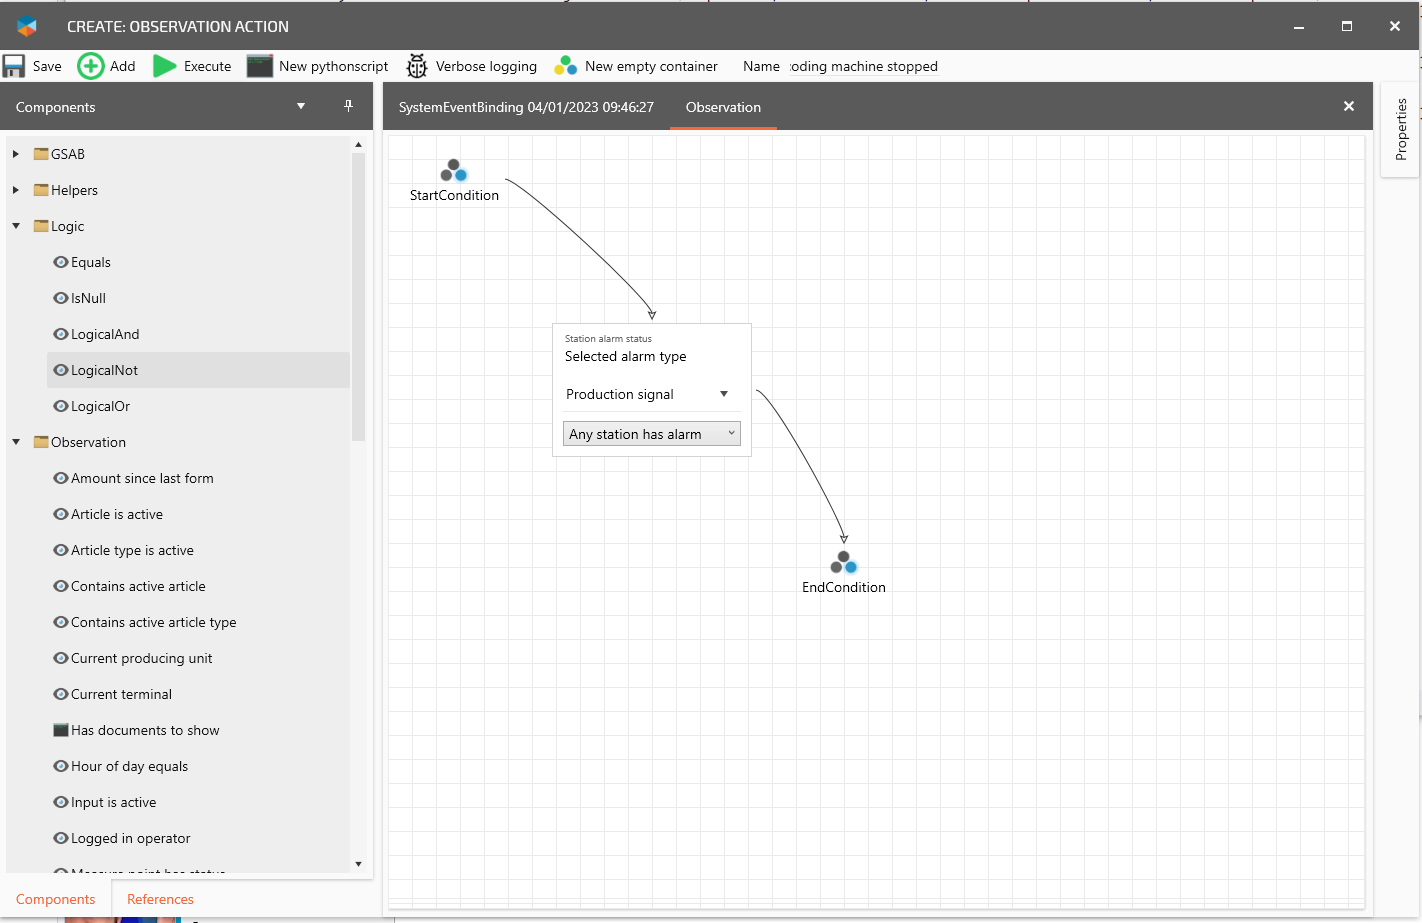
8. Select the “Station alarm status” component, press and hold “Alt” key and click on “EndCondition” component.
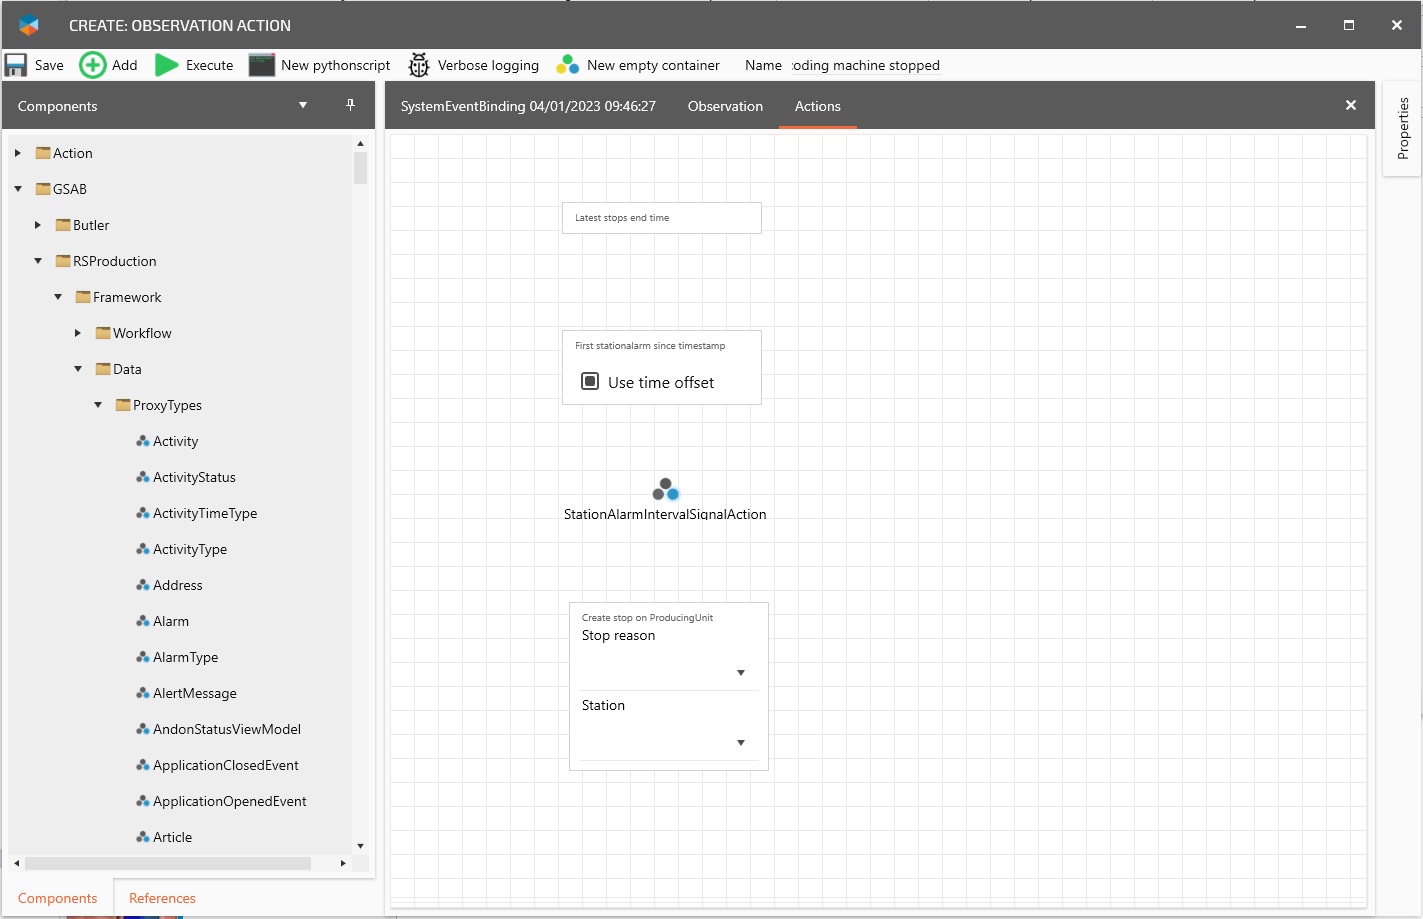
9. Click on the Tab “SystemEventBinding XX/XX/XXXX XX:XX:XX” and then double click o “Actions”
10. In the componentstab to the left find and add (“Using the add button on the top left”) the following components:
Helpers/Stop/Latest stops end time
Helpers/StationAlarm/First stationalarm since timestamp
Action/Categorized latest stop
GSAB/RSProduction/Framework/Data/ProxyTypes/StationAlarmIntervalSignalAction
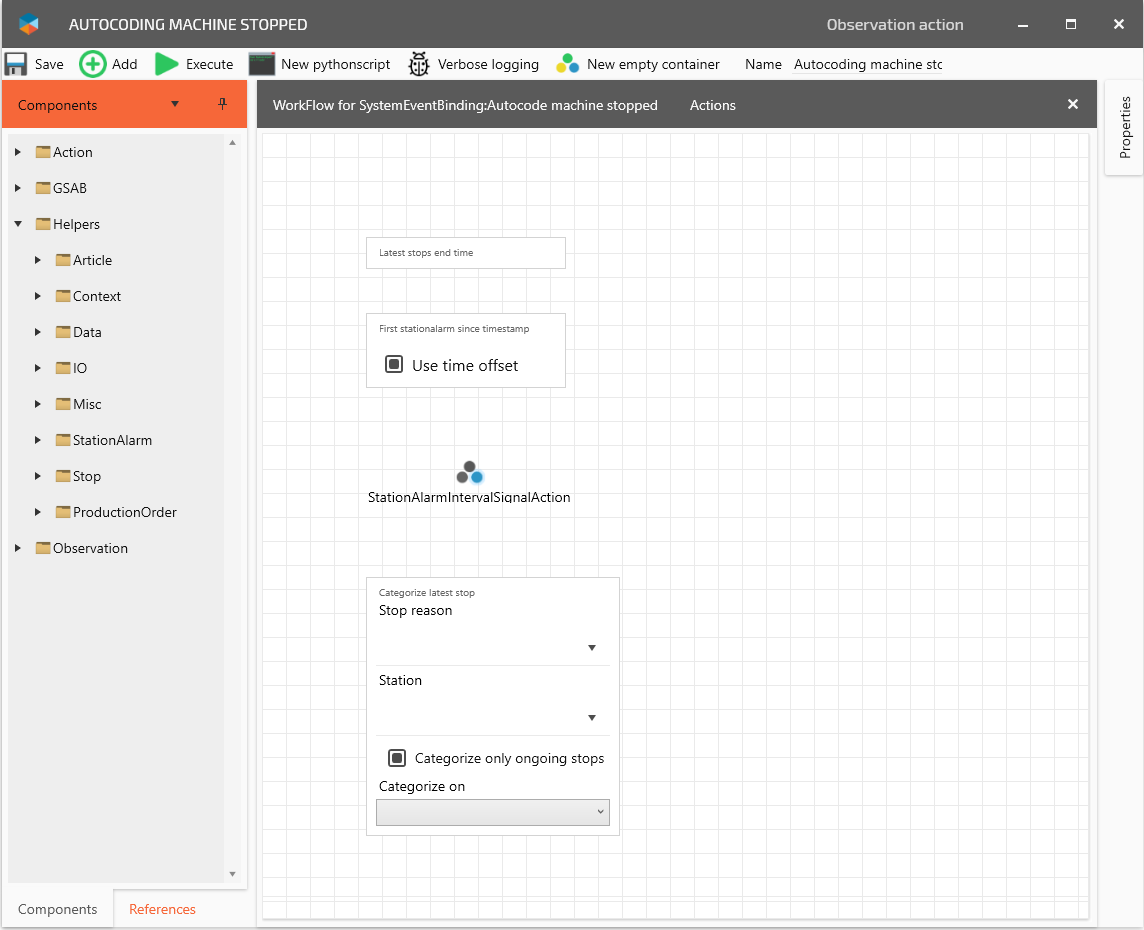
11. Select “Latest stops end time” component, hold “Alt” key on the keyboard and click on “First station alarm since timestamp” component.
12. Select “First station alarm since timestamp” component, hold “Alt” key on the keyboard and click on “stationAlarmIntervalSignalAction” component. Select “Output” on the left in the popup and then “InternalInstance” on the right in the popup.
13. Select “stationAlarmIntervalSignalAction” component, hold “Alt” key on the keyboard and click on “Categorize latest stop” component. Select “Station” on the left in the popup and then “Station” on the right in the popup.
14. Repeate Select “stationAlarmIntervalSignalAction” component, hold “Alt” key on the keyboard and click on “Categorize latest stop” component. Select “StopReason” on the left in the popup and then “StopReason” on the right in the popup.
15. Click Save on the top left corner
16. Find the Observation in the list and select “Measuring point entered stop status” as event
Event handling when using stationalarms as stop source
When all signals is configured and station alarm signals is created and connected to correct Station/Measuringpoints it is time to create the eventhandler.
In this example we will have 2 eventhandlers. One for when an alarm is raised and one for when an alarm is lowered.
If the alarm is a part of “Production signal” it will create a stop when raised if there was no stop from before and when it is lowered it will end the stop if all other “Production signal” alarms is lowered.
Station alarm active eventhandler (Machine stopped)
Navigate to Settings/Automation/Observations
Create a new Observation by clicking Create
3. Expand the window so that you can see the name field and fill in “Autocoding machine stopped”
4. Double click on Observation
5. In the componentstab to the left find and add (“Using the add button on the top left”) the following component:
Observation/Station alarm status
6. Choose “Production signal” and “Any station has alarm” on the “Station alarm status” component
7. Select “StartCondition”, press and hold “Alt” key on the keyboard and then click on the “Station alarm status” component to connect them.
9. Select the “Station alarm status” component, press and hold “Alt” key and click on “EndCondition” component.
10. Click on the Tab “SystemEventBinding XX/XX/XXXX XX:XX:XX” and then double click o “Actions”
11. In the componentstab to the left find and add (“Using the add button on the top left”) the following components:
Helpers/Stop/Latest stops end time
Helpers/StationAlarm/First stationalarm since timestamp
Action/Create stop on ProducingUnit
GSAB/RSProduction/Framework/Data/ProxyTypes/StationAlarmIntervalSignalAction
12. Select “Latest stops end time” component, hold “Alt” key on the keyboard and click on “First station alarm since timestamp” component.
13. Select “First station alarm since timestamp” component, hold “Alt” key on the keyboard and click on “stationAlarmIntervalSignalAction” component. Select “Output” on the left in the popup and then “InternalInstance” on the right in the popup.
14. Select “stationAlarmIntervalSignalAction” component, hold “Alt” key on the keyboard and click on “Create stop on ProducingUnit” component. Select “Station” on the left in the popup and then “Station” on the right in the popup.
15. Repeate Select “stationAlarmIntervalSignalAction” component, hold “Alt” key on the keyboard and click on “Create stop on ProducingUnit” component. Select “StopReason” on the left in the popup and then “StopReason” on the right in the popup.
16. Click Save on the top left corner
17. Find the Observation in the list and select “Station alarm started” as event
Station alarm inactive eventhandler (Machine started)
Navigate to Settings/Automation/Observations
Create a new Observation by clicking Create
3. Expand the window so that you can see the name field and fill in “Autocoding machine started”
4. Double click on Observation
5. In the componentstab to the left find and add (“Using the add button on the top left”) the following component:
Observation/Station alarm status
6. Choose “Production signal” and “No station has alarm” on the “Station alarm status” component
7. Select “StartCondition”, press and hold “Alt” key on the keyboard and then click on the “Station alarm status” component to connect them.
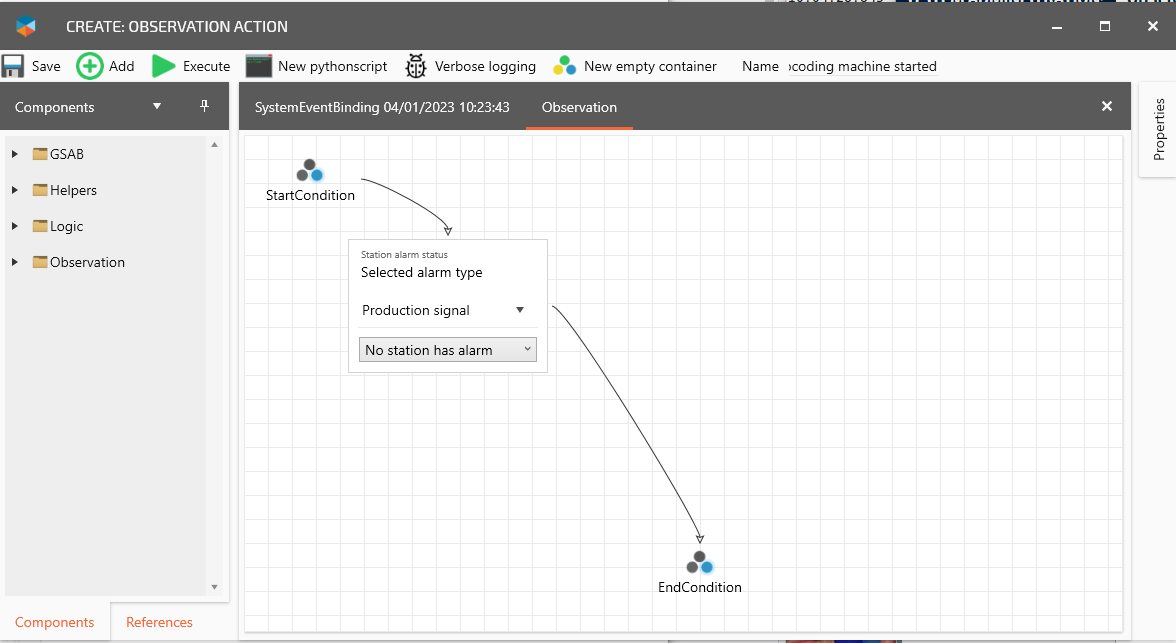
8. Select the “Station alarm status” component, press and hold “Alt” key and click on “EndCondition” component.
9. Click on the Tab “SystemEventBinding XX/XX/XXXX XX:XX:XX” and then double click o “Actions”
10. In the componentstab to the left find and add (“Using the add button on the top left”) the following component:
Action/End stop on producingunit
11. Save the observation by clicking on “Save” in the upper left corner and then close the window
12. Find the Observation in the list and select “Station alarm stopped” as event
The configuration is now finished and it is time to test out the logic and in some cases do adaptations if needed. This logic is now active for all measuringpoints in this installation but only affect measuringpoints with station alarms.